






Gaming Chair Gas Cylinder Explained: Class Ratings and When to Replace
You're mid-session, locked in, and then — slowly but unmistakably — your chair starts sinking. By the time you notice, your elbows are up near your chin and your back is screaming. The culprit is almost always the same: a failing gas cylinder. It's one of the most common issues with gaming chairs, and one of the most misunderstood components in the entire setup.
Most guides jump straight to the replacement steps without ever explaining why cylinders fail, what those stamped class numbers actually mean, or how to make sure the next one lasts. This guide fixes that. We'll break down how the hydraulic gas piston works, decode the Class 1 through Class 4 rating system, walk you through every sign that replacement is overdue, and show you exactly how to do it — so your chair performs the way it should for years to come.
What Is a Gaming Chair Gas Cylinder?
The gas cylinder — also called a hydraulic gas piston or gas lift — is the telescoping metal tube that sits at the very center of your chair, connecting the seat mechanism to the five-star base. Its job sounds simple: let you raise and lower your seat height with a single lever pull. But what makes it work is more interesting than most people realize.
Inside the cylinder is a sealed chamber filled with highly compressed nitrogen gas, along with a small amount of oil that dampens movement and lubricates the internal seals. When you pull the lever beneath your seat, a valve opens and allows gas to flow from one side of the internal piston to the other, raising or lowering the chair smoothly under your weight. Release the lever and the valve closes again, locking the piston — and your seat — in position. The entire mechanism is a sealed unit, which means it cannot be refilled or repaired once the internal seals degrade. Replacement is the only lasting fix.
Beyond height adjustment, the gas cylinder also acts as a structural load-bearing component. Every time you sit down, shift your weight, recline, or lean forward, the cylinder is absorbing and distributing that force. For gamers who spend hours in the chair daily, this constant mechanical stress is exactly why cylinder quality matters so much — and why the class rating system exists.
Gas Cylinder Class Ratings Explained (Class 1 Through 4)
That number stamped on the metal housing of your cylinder — Class 2, Class 3, or Class 4 — is not marketing language. It's an internationally recognized classification based on measurable engineering specifications: specifically, the wall thickness of the inner and outer steel tubes, the purity of the nitrogen gas used, and the maximum load the cylinder can safely sustain under testing. Higher class number means thicker walls, higher-purity gas, and greater structural integrity.
Here's how the four classes break down:
- Class 1: The thinnest wall construction and lowest weight tolerance. Rarely used in modern chairs due to minimal durability. Typically found only in the most basic budget seating.
- Class 2: A step up in wall thickness but still limited in load capacity. Once common in mid-range task chairs; increasingly rare in contemporary gaming or ergonomic seating.
- Class 3: The most widely used classification in standard office chairs. Supports up to approximately 150 kg (330 lbs) under typical conditions and offers reliable performance for moderate daily use — around four to six hours per day. Wall thickness on the inner tube is typically around 1.5 mm.
- Class 4: The premium tier, built specifically for heavy-duty and high-intensity applications — executive chairs, medical recliners, and gaming chairs. Inner wall thickness increases to around 1.8 mm or more, nitrogen purity rises to 95% or higher (versus roughly 85% in Class 3), and tested load capacities can reach 250 kg (550 lbs) or beyond. This is the specification that serious gaming chairs should meet.
Quality Class 4 cylinders are independently verified through certification bodies like SGS and TÜV, and genuine units will have the class designation stamped directly into the metal body — not printed on a label that can be faked. When you're evaluating any gaming chair, asking about the cylinder class is one of the most practical quality checks you can make. It tells you more about long-term durability than almost any other single specification.
Class 3 vs. Class 4: What It Actually Means for Gamers
On paper, a Class 3 cylinder might seem sufficient for most adults — and for someone using a chair two or three hours a day for light office work, it often is. But gaming chairs operate in a very different environment. Extended sessions, frequent recline, dynamic weight shifts during competitive play, and the sheer daily hours of use all impose conditions that Class 3 simply wasn't designed to handle reliably over the long term.
The practical difference between the two classes shows up in three areas. First, weight tolerance: a Class 3 cylinder is typically rated to around 150 kg (330 lbs), while Class 4 units can handle 250 kg (550 lbs) or more. Second, longevity: Class 3 cylinders under regular use last around five years before showing signs of wear; Class 4 construction, with its thicker steel and higher-purity nitrogen, is engineered to sustain eight to ten or more years of intensive use. Third, stability: the thicker walls in a Class 4 unit reduce flex and micro-vibration at the base, which translates to a more planted, wobble-free feel — something you notice immediately when going from a budget cylinder to a quality one.
For the vast majority of gamers, the recommendation is straightforward: if your chair came with a Class 4 hydraulic gas piston, replace it with Class 4 or better. Downgrading to Class 3 for cost savings is false economy — the cylinder will wear faster, and a failing cylinder mid-session is more disruptive and potentially more dangerous than the upfront cost difference. If you're in the market for a new gaming chair and want to verify what's under the seat of each model before buying, the Blacklyte chair comparison page is a useful reference point.
6 Signs Your Gaming Chair Gas Cylinder Needs Replacing
A gas cylinder doesn't usually fail all at once. It degrades gradually, and the signs are easy to dismiss at first. Here's what to watch for:
- The chair slowly sinks under your weight. This is the most common and clearest indicator. If you set the chair to your preferred height and it drifts downward over the next few minutes — or within seconds of sitting — the internal seals are compromised and gas is escaping. The cylinder can no longer hold consistent pressure.
- You hear a hissing sound when adjusting height. A faint hiss when you pull the lever suggests gas is escaping through a deteriorating seal rather than controlled internal flow. If the sound occurs without lever activation, the situation is more urgent.
- The lever feels loose or unresponsive. When the valve mechanism that controls gas flow begins to wear out, height adjustments may feel mushy, require multiple pulls, or stop working in one direction. This is distinct from seal failure but often appears alongside it in older cylinders.
- The chair feels wobbly or unstable at the base. A worn cylinder can fail to distribute your seated weight evenly, causing the seat to feel uneven or the entire chair to rock slightly. Because the cylinder is the structural link between the seat mechanism and the base, any looseness there propagates upward into your seated position.
- You're readjusting height constantly throughout the day. If you find yourself pulling the lever to reset your height multiple times per session, the cylinder is no longer holding position reliably. This puts additional strain on the valve with every adjustment, accelerating the degradation further.
- Visible corrosion or damage to the cylinder body. Inspect the chrome-finished exterior. Rust spots, deep scratches, or visible dents compromise the structural integrity of the tube and should be treated as immediate replacement triggers, not cosmetic issues.
It's worth noting that a sinking chair is not always a cylinder problem exclusively. Damaged casters, a cracked base, or a loosened seat mechanism plate can create similar symptoms. Before ordering a replacement, confirm the cylinder is the actual failure point by checking height lock stability without body weight first, then progressively adding load. If the chair holds empty but sinks once you sit, the cylinder seal is almost certainly the cause. For a broader look at ergonomic setup and what proper seated positioning should feel like, the Blacklyte Ergonomics guide is a useful diagnostic reference.
How to Replace a Gaming Chair Gas Cylinder (Step-by-Step)
Replacing a gas cylinder is a manageable DIY task that typically takes under 30 minutes with basic tools. The cylinder is press-fitted into two points — the underside of the seat mechanism and the center hub of the wheel base — so no threading or bolts are involved. What you need is controlled force and a little patience.
What you'll need:
- Rubber mallet
- Pipe wrench or locking pliers
- Penetrating oil (for older, stuck cylinders)
- Clean cloth or rag
- Work gloves
- Replacement cylinder (correct class rating and dimensions)
- Prepare your workspace. Move the chair to an open, flat surface and lay down a mat or thick towel to protect both the floor and the chair components. Lower the chair to its minimum height before starting. If your chair has any electronic accessories (USB hubs, integrated lighting), unplug them now to avoid strain on wiring during disassembly.
- Flip the chair and remove the wheel base. Tip the chair onto its side or lay it upside down. Grip the wheel base firmly and pull it straight off the cylinder. On most chairs this releases with steady pulling force. If the base resists, use a rubber mallet to tap gently around the center hub while rotating slightly — this breaks the taper seal that forms between the cylinder and the base over time.
- Detach the old cylinder from the seat mechanism. With the base removed, the cylinder's upper taper is still seated inside the chair's tilt mechanism. Grip the cylinder body firmly with locking pliers or a pipe wrench, then twist and pull downward with steady pressure. Avoid sudden jerking motions — slow, deliberate rotation breaks the press fit more reliably than force.
- Treat stuck components if needed. Older chairs, particularly those with several years of use, can develop corrosion at the contact points between the cylinder and the mechanism. Apply penetrating oil to both the upper and lower contact areas and let it sit for 10 to 15 minutes before reattempting removal. Never apply heat or attempt to puncture the cylinder — it is a pressurized component and must be handled carefully throughout disposal as well.
- Clean both sockets. Once the old cylinder is out, wipe the receiving holes in both the seat mechanism and the wheel base hub with a clean dry cloth. Remove any debris, rust flakes, or residual grease. A clean contact surface ensures the new cylinder seats properly and prevents premature loosening.
- Install the new cylinder. Insert the narrower piston rod end of the new cylinder upward into the seat mechanism first, then slide the wheel base onto the wider outer tube below. The taper design means no fasteners are needed — the components lock through press-fit geometry.
- Secure the fit and test. Stand the chair upright, then sit down firmly once to drive the cylinder fully into both contact points under your body weight. This is what sets the taper locks. Adjust the height lever through its full range and test stability by leaning in all directions. Any residual wobble means one of the contact fits isn't fully seated — stand up, recheck alignment, and press down again.
- Dispose of the old cylinder responsibly. The used cylinder is a pressurized metal component. Take it to a metal recycling facility that accepts pressurized goods. Never puncture, crush, or incinerate it.
How to Choose the Right Replacement Cylinder
The replacement market is full of cylinders at wildly different price and quality points, and "universal fit" claims deserve healthy skepticism. Here's what to verify before purchasing:
- Match the class rating. If your original cylinder was Class 4, replace with Class 4. Do not downgrade. If you don't know the original class, inspect the cylinder housing for a stamped marking. No markings typically indicate a lower-grade unit, in which case upgrading to Class 4 is the smarter call.
- Measure the dimensions. Most gaming chairs use a standard 50 mm outer diameter tube, but stroke length — the travel distance when adjusting height — varies. Measure the collapsed and extended length of your old cylinder to ensure the new one delivers the same height range. A stroke that's too short will put you sitting lower than your ergonomic setup requires.
- Verify weight capacity. Choose a cylinder rated at or above your body weight with room to spare. Reclining increases the effective load on the cylinder, so a cylinder rated at exactly your bodyweight is already being stressed every time you lean back.
- Check certifications. Look for SGS, TÜV, or BIFMA certification on the packaging or product listing. Certification means the cylinder has been independently tested against defined safety and durability standards — not just rated by the manufacturer's own claims.
- Confirm brand compatibility. Some manufacturers use proprietary cylinder dimensions or seat mechanism fittings. Check your chair's documentation or contact the brand directly before assuming a standard cylinder will fit. Blacklyte owners can reach out through the Blacklyte contact page for model-specific guidance.
One more consideration worth mentioning: a replacement is also an upgrade opportunity. If you're a taller user and your current seat height always felt slightly low, a longer-stroke cylinder can address that. If you recline heavily during sessions, a heavy-duty Class 4 unit with a higher weight rating gives you more structural margin. You can also use this moment to assess whether the rest of the chair still warrants the investment — if the frame, foam, and mechanism are all in good shape, a quality replacement cylinder is absolutely worth it. If multiple components are failing, it may be time to explore the full Blacklyte gaming chair lineup instead.
Maintenance Tips to Extend Cylinder Life
A quality Class 4 cylinder installed correctly can last eight to ten or more years — but only if the basics are maintained. These aren't complicated steps. They're the kind of small habits that prevent the very avoidable failures that cause most premature replacements.
- Stay within the rated weight capacity. Exceeding the cylinder's weight tolerance — even occasionally — compresses the internal seals beyond their design parameters. Factor in reclining when you assess this: leaning back shifts load concentration onto the cylinder in ways that straight sitting does not.
- Sit down with control, not impact. Dropping heavily into the seat creates short but intense shock loads on the cylinder internals. Over hundreds of sessions, this impact accumulates. Lower yourself in with intention, especially when the chair is at its maximum height.
- Operate the height lever while seated, not with impact. Adjusting height while bouncing or shifting weight rapidly forces the valve to work under uneven load. Adjust deliberately, with weight evenly distributed.
- Clean the cylinder base regularly. Dust, hair, and debris accumulate around the cylinder where it enters the wheel base hub. Wipe this area down monthly with a dry cloth. Abrasive debris in the contact zone accelerates surface wear on the outer tube.
- Apply silicone lubricant if height adjustment feels stiff. If the lever motion becomes resistant or the seat movement feels uneven, a small amount of silicone-based spray applied at the cylinder-to-mechanism junction can restore smooth function. Avoid oil-based lubricants, which attract dust and can degrade rubber seals over time.
- Inspect every few months. A quick check takes two minutes. Sit in the chair, set your preferred height, wait several minutes, and see if it holds. Look at the cylinder housing for rust or new surface damage. Catching early-stage seal degradation early means you can plan a replacement on your schedule rather than in the middle of a session.
For more guidance on maintaining a properly configured ergonomic setup — cylinder health included — the Blacklyte Gaming Hub covers ergonomics for extended play in detail.
FAQs
What does the class rating on a gaming chair gas cylinder actually measure?
Class ratings (1 through 4) measure the structural quality of the cylinder based on steel wall thickness, nitrogen gas purity, and maximum load capacity under independent testing. Class 4 has the thickest walls, highest-purity nitrogen, and the greatest load tolerance — making it the correct specification for gaming chairs used intensively.
How long should a gaming chair gas cylinder last?
A quality Class 4 cylinder under normal use can last eight to ten years or more. Class 3 cylinders typically show wear within five years under regular use, and budget Class 1 or 2 units may begin failing in as little as two to four years. Daily hours of use, user weight, frequency of reclining, and how deliberately the height lever is operated all affect lifespan.
Is a Class 4 cylinder always necessary, or will Class 3 work?
For gamers spending four or more hours daily in the chair, Class 4 is strongly recommended. Class 3 is sufficient for light-to-moderate use, but under the sustained loads of extended gaming sessions — especially with frequent reclining — it will wear faster. The longevity advantage of Class 4 typically justifies the modest price premium.
Can I repair a leaking gas cylinder instead of replacing it?
No. Gas cylinders are sealed, pressurized units. Once the internal seals degrade and nitrogen begins escaping, there is no practical way to restore them. Attempting to open or refill a gas cylinder is dangerous. Replacement is the only safe and reliable solution.
Are gaming chair gas cylinders universal?
Most use a standard 50 mm outer diameter, but stroke length and seat mechanism compatibility vary. Always measure your existing cylinder's dimensions and check your chair's documentation before purchasing. If your chair is from a specific brand, contact the manufacturer to confirm compatibility — especially for premium models that may use custom fittings.
Does Blacklyte use Class 4 hydraulic gas pistons in their chairs?
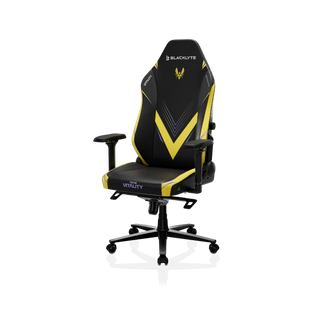
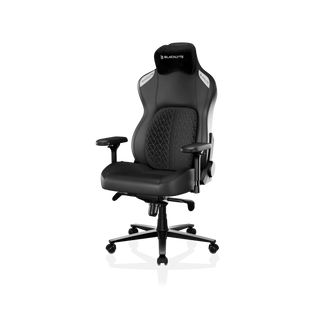
Yes. All current Blacklyte gaming chairs — including the Kraken Pro, Athena Pro, and Athena — are equipped with Class 4 hydraulic gas pistons, matching the heavy-duty standard appropriate for intensive gaming use. You can review full specifications and compare models on the Blacklyte chair comparison page.
The Bottom Line
The gas cylinder is the mechanical foundation your entire seating position rests on. When it fails, everything downstream suffers — your posture, your comfort, and your focus. Understanding the class rating system means you can evaluate chairs and replacements with real criteria, not just trust the marketing. Class 4 is the standard that genuinely demanding gaming use requires, and it's the standard worth insisting on whether you're buying new or replacing a worn component.
If your chair is still sinking after reading this, the fix is usually straightforward. But if the cylinder isn't the only thing wearing out, it may be worth revisiting the foundation entirely. Blacklyte's gaming chair lineup — the premium Kraken Pro, the flagship Athena Pro, and the entry-level Athena — is built around Class 4 hydraulic gas pistons, aluminum alloy bases across the lineup, and ergonomic engineering designed for the long haul. Every chair ships with a warranty extendable up to five years, so the investment is covered well beyond your first session.
Good seating isn't just about comfort. It's about consistency — the same support, the same height, the same posture, session after session. That starts with what's underneath you.
Need Help Choosing the Right Chair?
Whether you're replacing a failing cylinder or ready to upgrade the whole setup, the Blacklyte team is here to help you find the right fit. Reach out directly and get expert guidance on which chair, specification, or accessory suits your setup and session length.
Contact Us


